If you have spent time on REVER’s route planning site online (not in-app planning), you’ve likely discovered that plotting a route is as easy as clicking along a map. But what if you want to export that ride as a GPX file for a Garmin GPS device instead of navigating from the phone app? Not a problem, but there are actually quite a few steps involved that we’ll go over here.
The Process
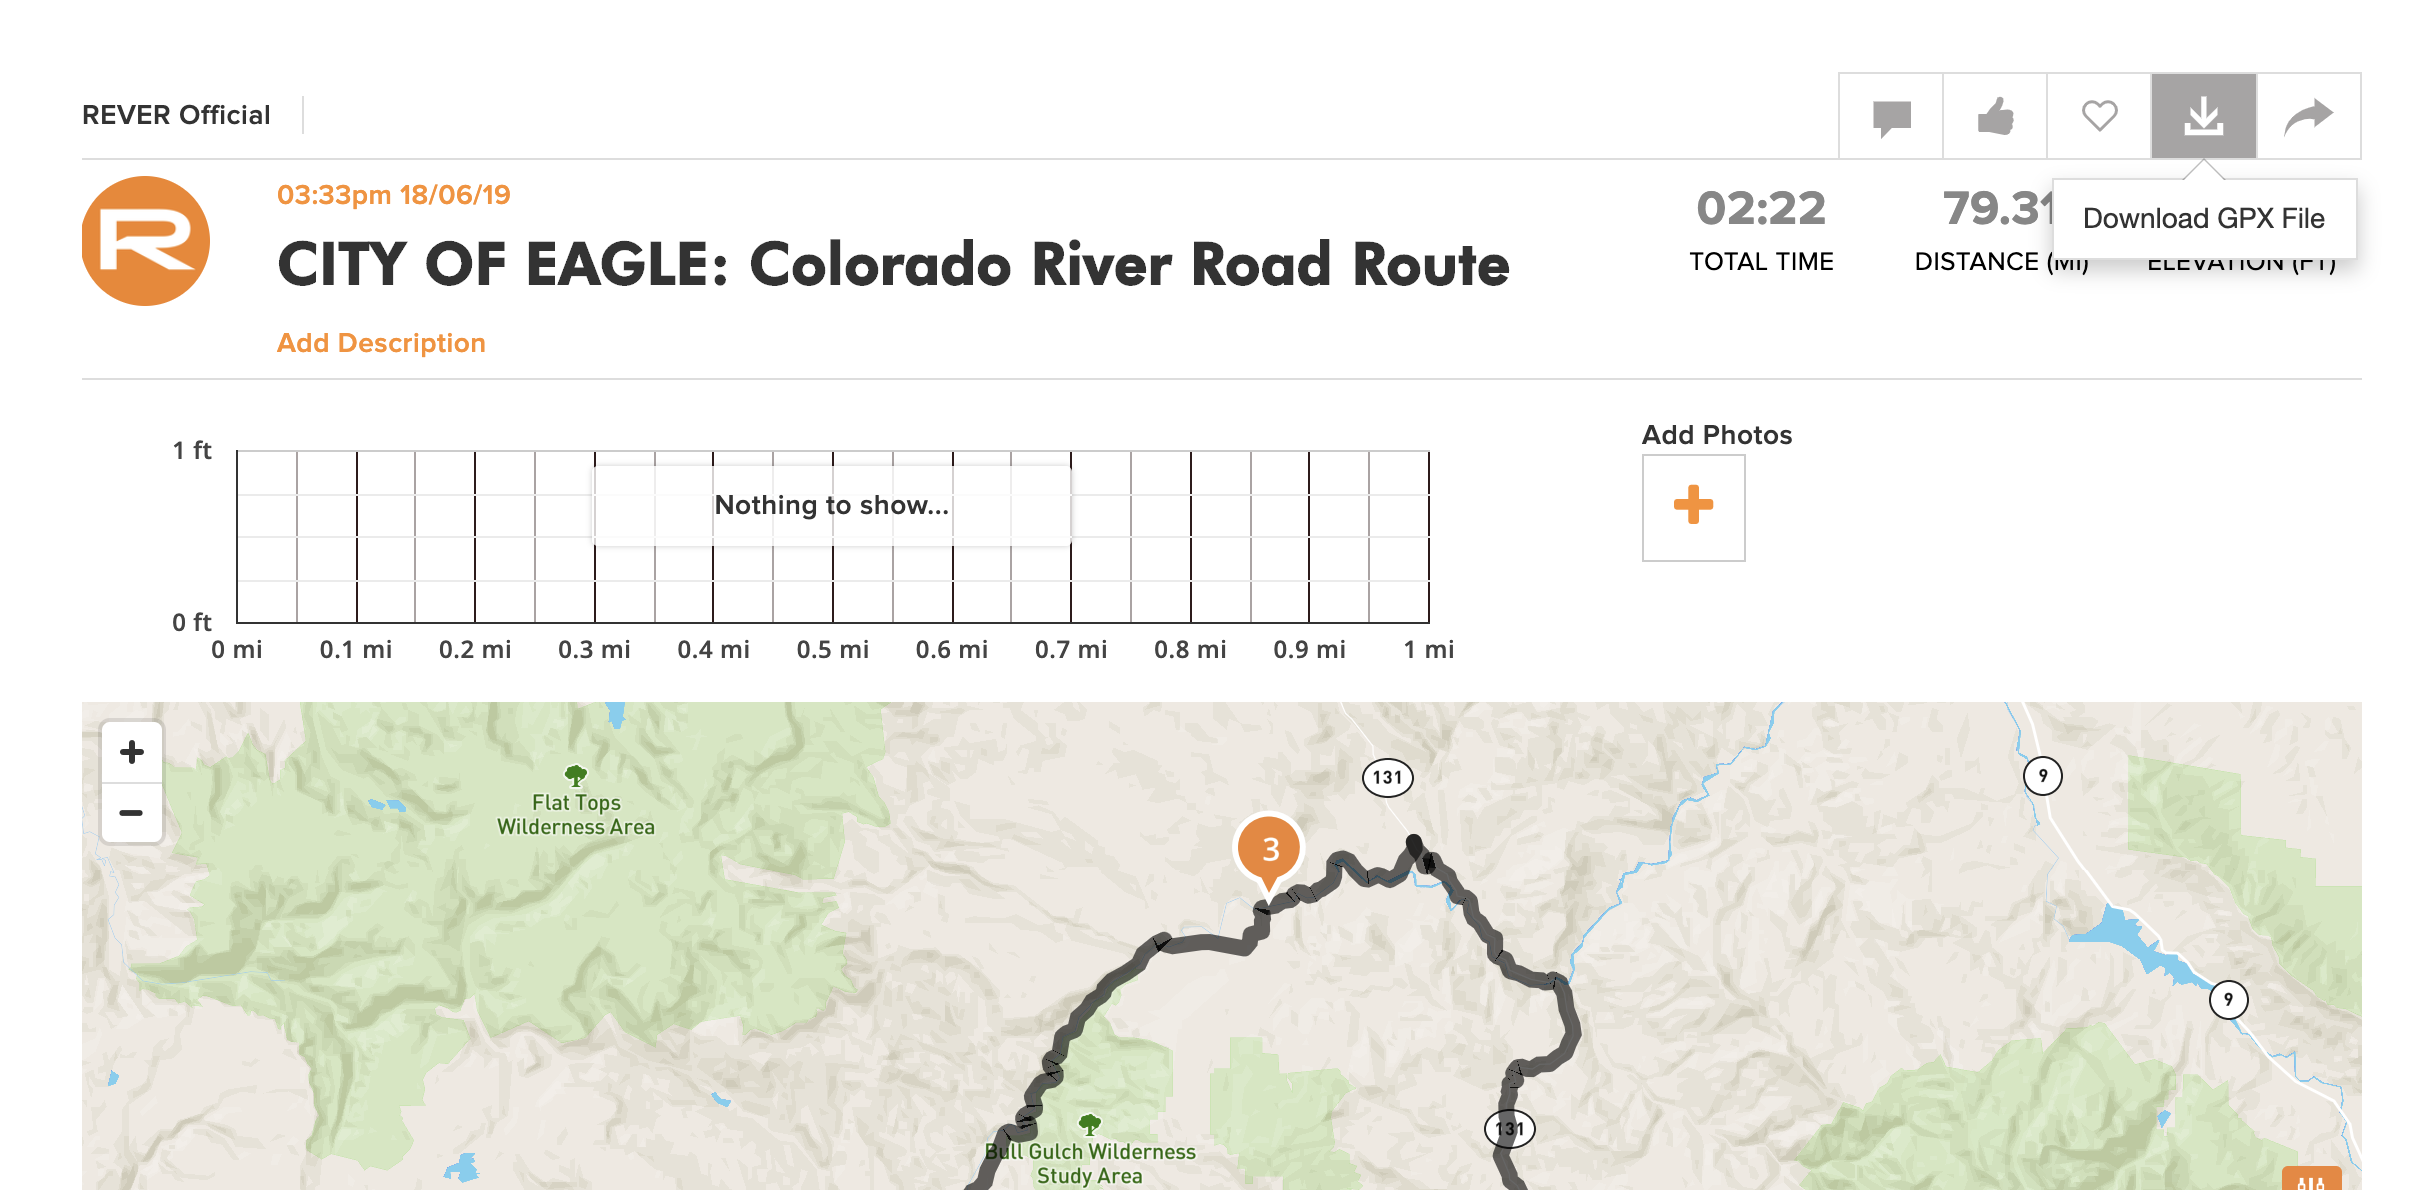
1.) After saving your ride, you will land on the Ride Details Page. In the upper right toolbar, you will click on the Download GPX icon.
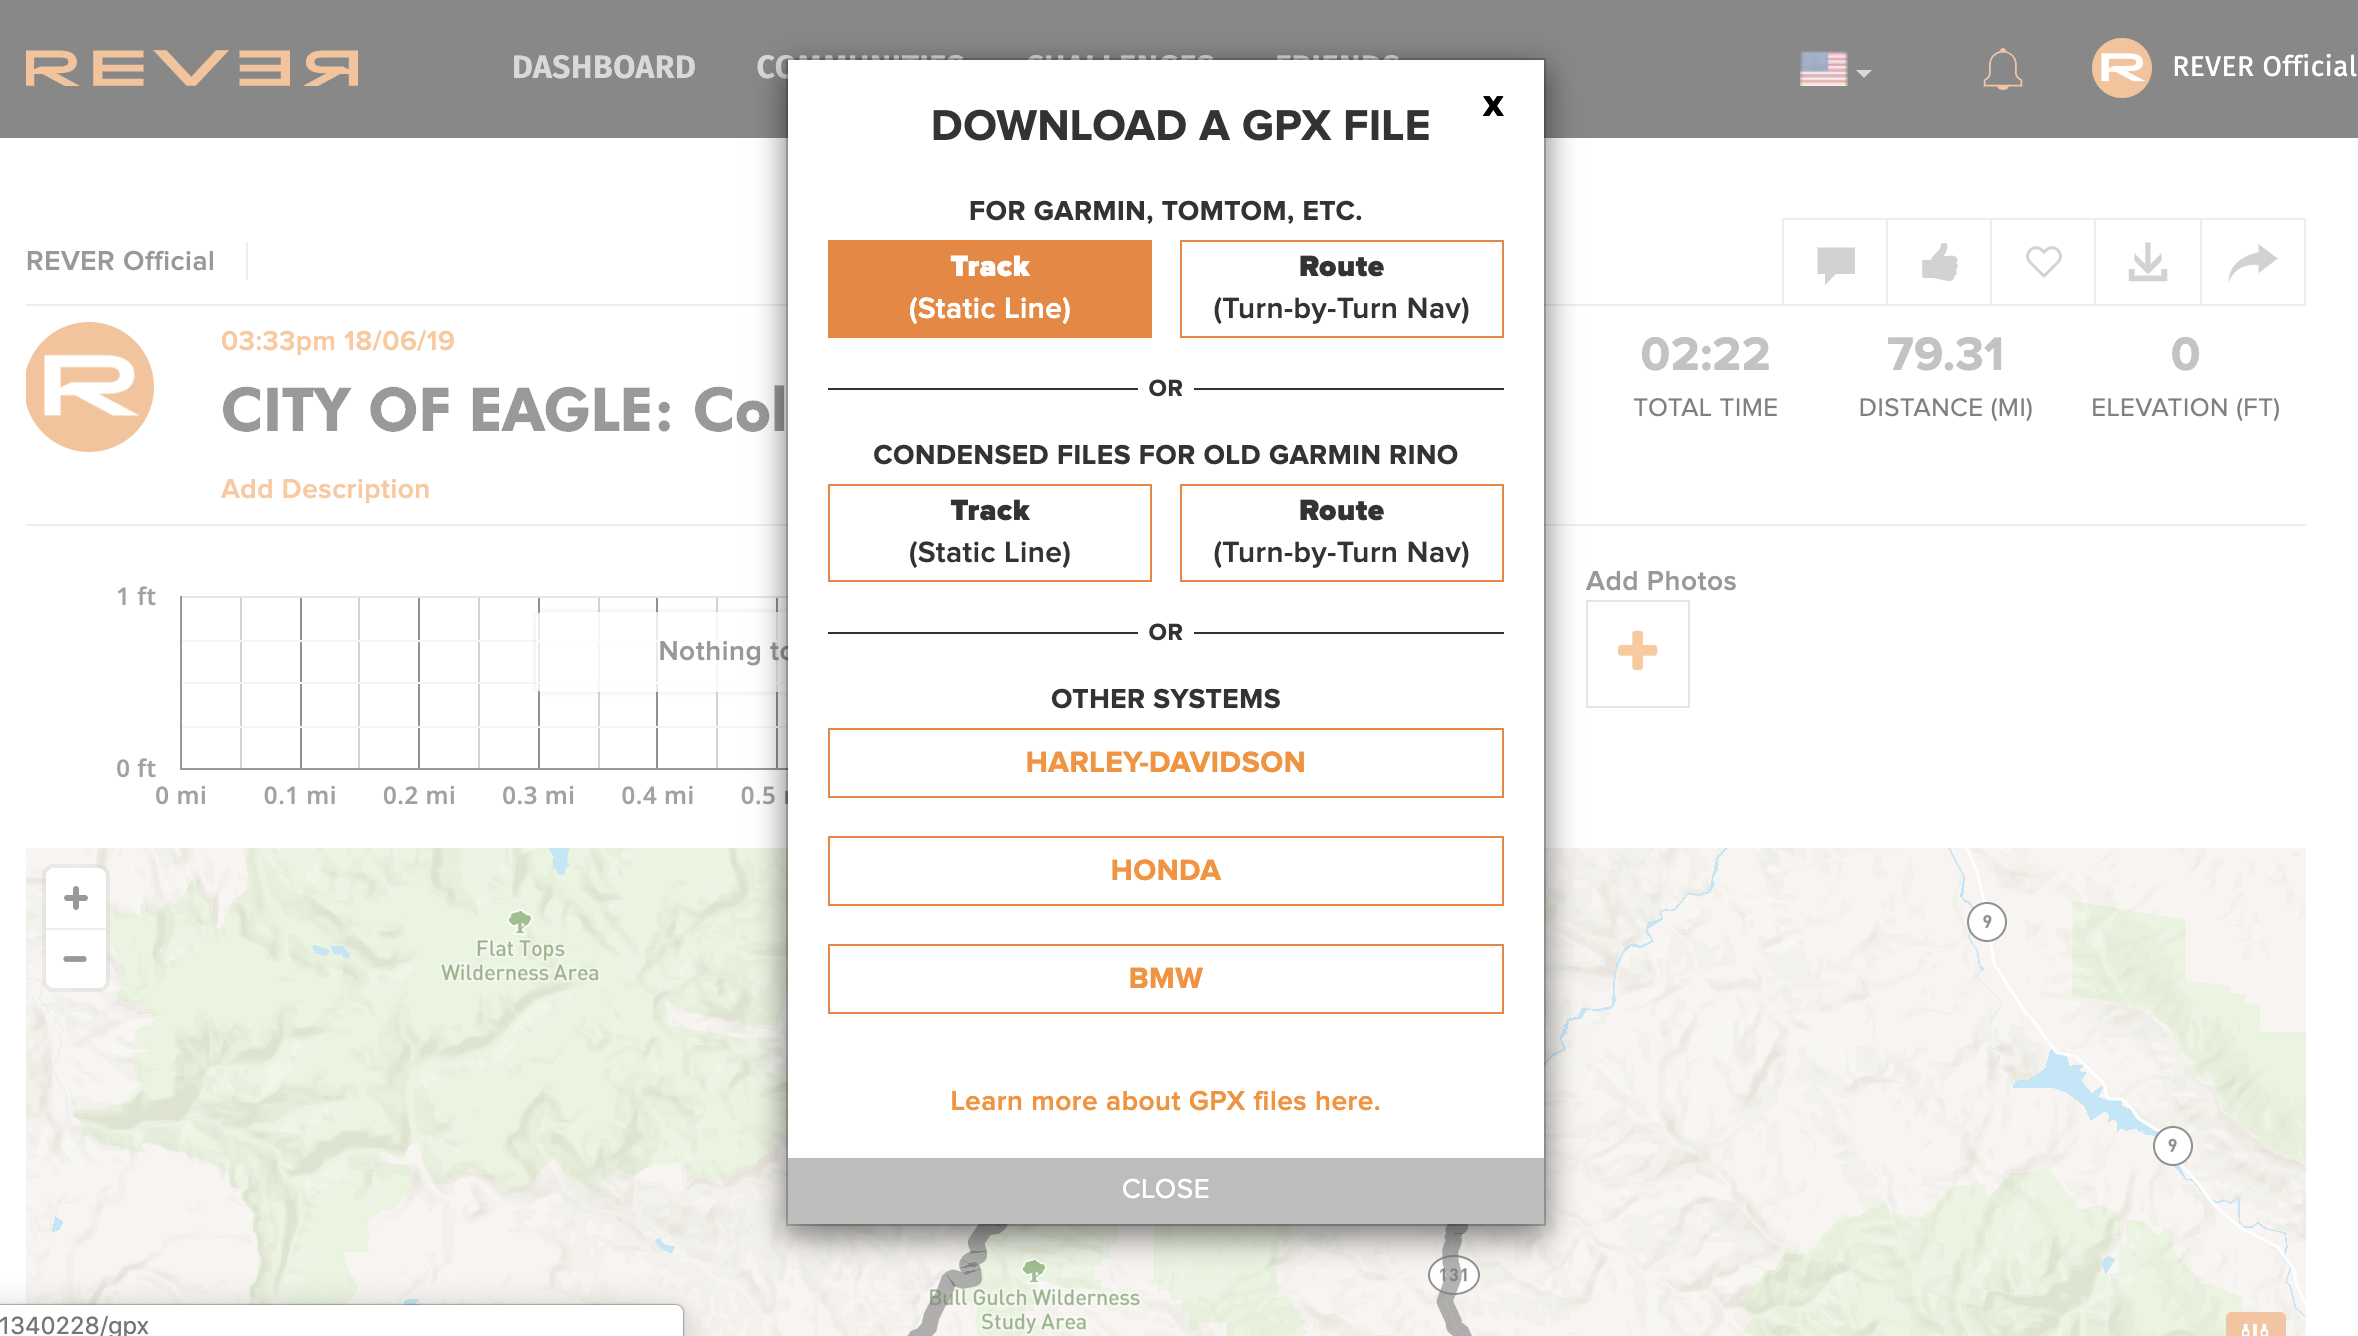
2.) A pop-up window will appear with multiple download options. For Garmin units (INCLUDING BMW branded units like the Navigator V and VI) we recommend you use the Track selection from the upper left.
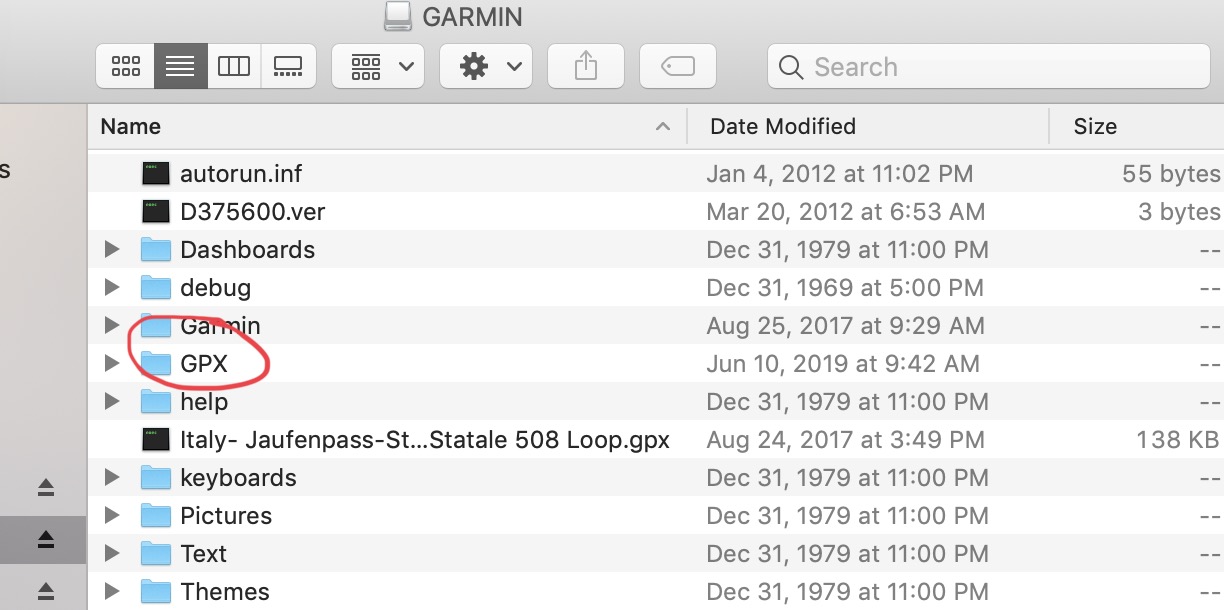
3.) Once the file is downloaded, you will plug your Garmin unit into your computer and move the file into the unit’s GPX folder. You can now eject your device from your computer.
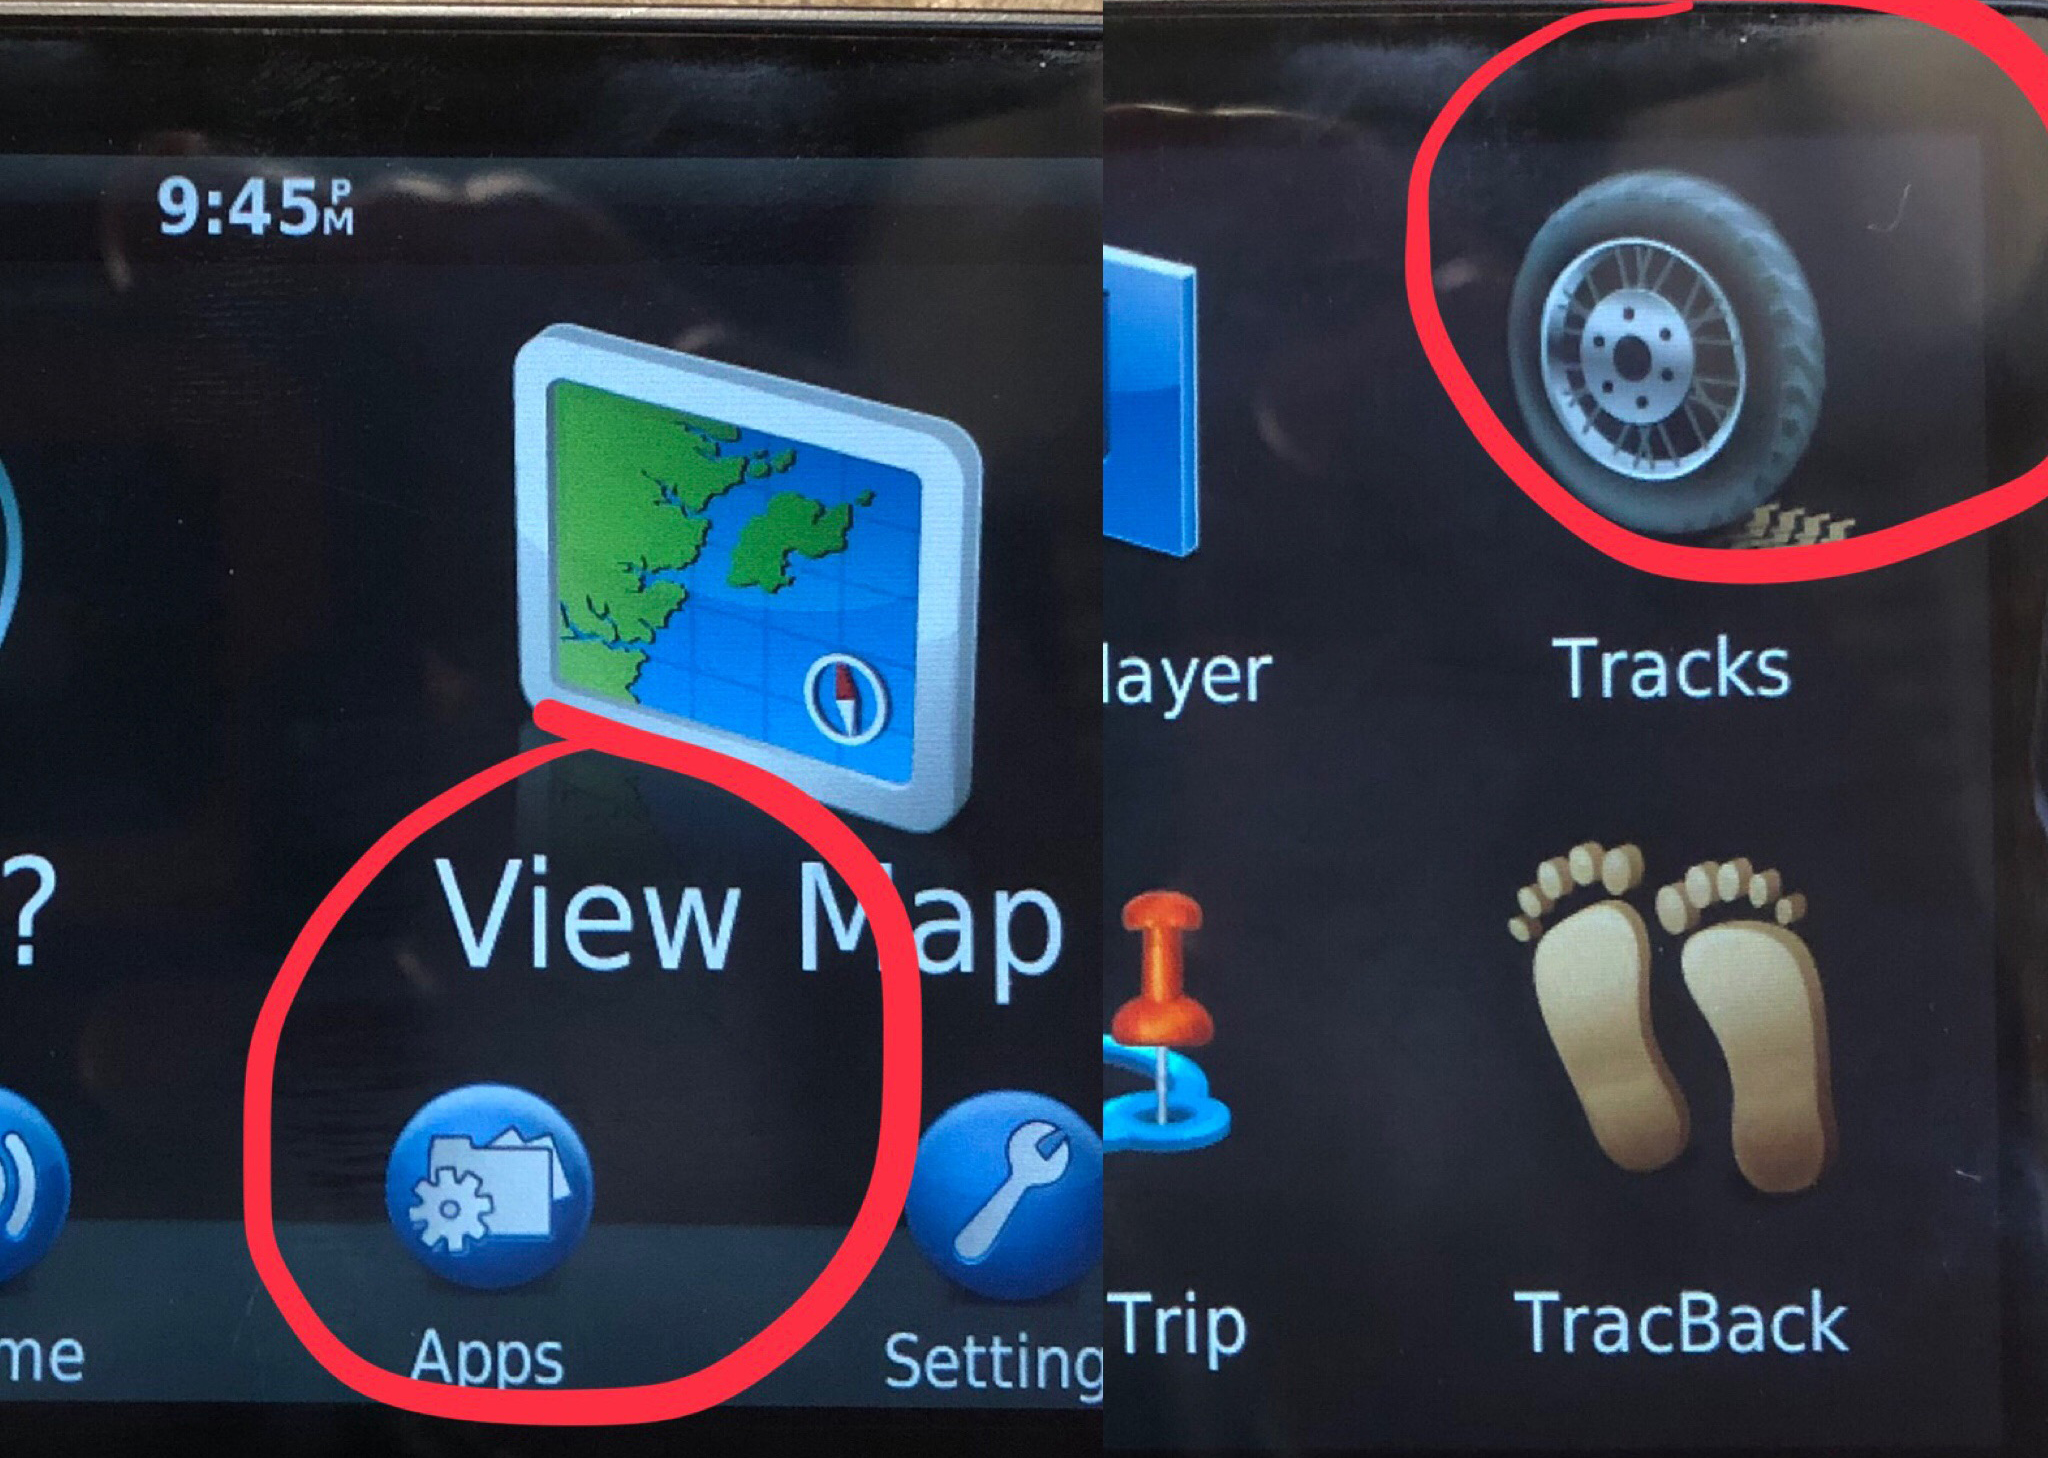
4.) On the Garmin Unit, click on Apps and then select Tracks. Scroll to find the ride you imported and select it. You will then click on the Tool icon and select Convert to Trip. Choose Start to Finish of if you want to ride it the other way Finish to Start.
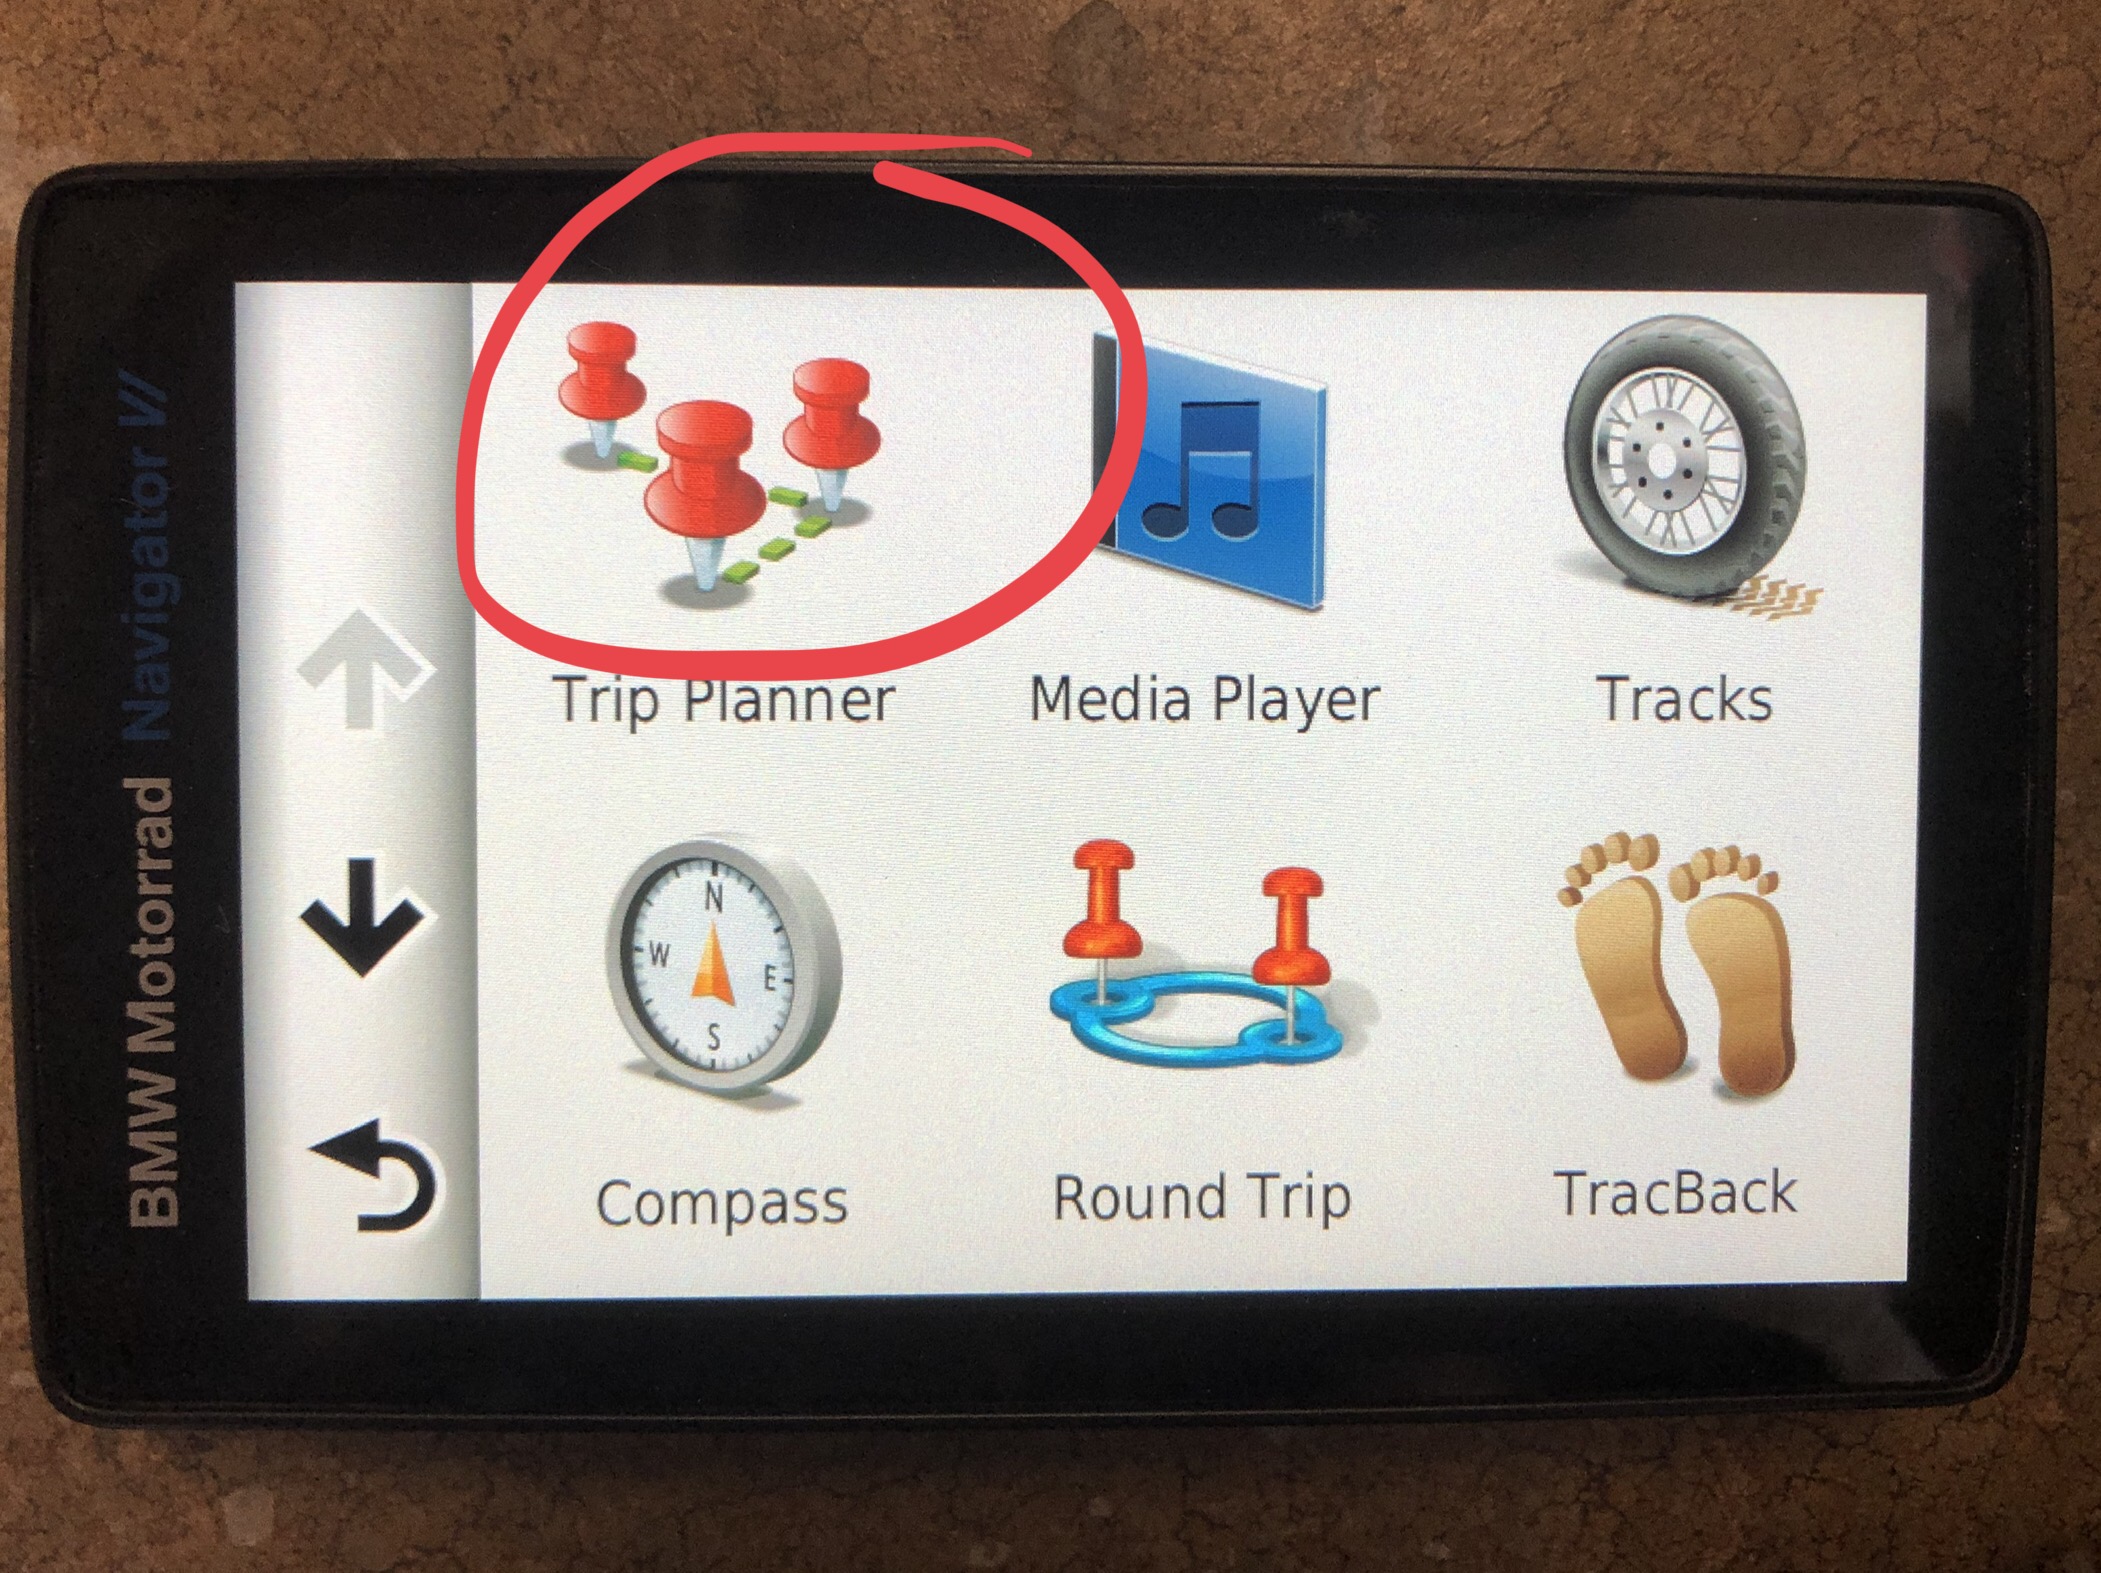
5.) Now exit out and go to the Trip Planner app. Select the ride. You can view it by selecting the Map button, or select Go! To ride it.
TIPS
1.) Turn Auto Recalculate to OFF: If it is on it will ignore your planned route and find the quickest way to your final destination.
2.) If you get off route, do not hit recalculate, as the Garmin won’t redirect you back onto your custom route, it will try and route you to the destination in the quickest way possible, essentially overwriting your route.
3.) As long as you stay on the route line, the Garmin will give you turn-by-turn directions, but once you leave the route, that all goes out the window and you will have to ride back onto the route where it will resume turn-by-turn navigation.


.png)


